Configuring OpenID Connect (OIDC) / SSO based authentication
Many organizations and developers are already familiar with OpenID Connect (OIDC). OIDC is a layer that sits on top of OAuth 2.0 and performs the authorization necessary to access protected resources, such as the Anka Build Cloud Controller. Let’s walk through what you need to know to set it up and protect your Controller Dashboard/UI.
Before you begin
Requires an Anka Enterprise Plus license.
It currently only protects the UI/Dashboard and is not available for API or others types of protection.
If you’re using root token auth for your Controller UI, without certificate authentication, Nodes will no longer be able to connect to port 80 (or whatever port you’ve set) when running ankacluster join. You’ll need to setup an interface for them to communicate. Or, use a User Access Key.You must have at least one node with a Enterprise or higher license joined to the Controller for these features to work.
We currently only support Code/Explicit Flow.Usage Instructions
When using OIDC, you’ll need an Authorization Provider or Server. Most of our customers use Providers like Okta, Cyberark’s Idaptive, and others. we won’t get into the specifics for these tools as they often differ greatly. However we will go through several general things you need to know, regardless of provider.
Required Changes
Anka Build Cloud Controller & Registry
- Set
ANKA_OIDC_CLIENT_SECRETto the Client Secret you generate at your provider application. - Set
ANKA_OIDC_PROVIDER_URLto the appropriate provider URL for oauth2. For example, in Okta, I would set this tohttps://dev-123456.okta.com/oauth2/default. - Set
ANKA_OIDC_CLIENT_IDto the client ID for the application.
At Your Provider
- Your provider config must allow a redirect to the Anka Controller at
/oidc/v1/callback. The URL doesn’t need to be public, but must match the hostname or IP (and port) you use locally. As an example, in Okta, you’ll setSign-in redirect URIstohttps://anka.controller:8090/oidc/v1/callback. - The controller/your browser will request certain
scopesfrom the provider. Thesescopeshaveclaimsattached. By default, we look foropenid,profile, andgroups. - Within the
scopes, we look forclaims. The followingclaimsare required (by default):name(part ofprofile) &groups. These are changeable withANKA_OIDC_GROUPS_CLAIMandANKA_OIDC_USERNAME_CLAIMin your controller’s config. In version 1.29.0, we will also look forscopesusing the values of those ENVs. - Once the
scopesare requested successfully, the data returned needs to be in a specific format (id_token&token). We make the request withresponse_typeto ensure this. - The
groupsclaim is expected to be an array of strings, each correlating to a Controller permission group.
Here is an example config showing what it looks like for a user with Okta:
  anka-controller:
    container_name: anka-controller
    build:
       context: .
       dockerfile: anka-controller.docker
    ports:
       - "8090:80"
    volumes:
       - /Users/myUserName:/mnt/cert
    depends_on:
       - etcd
       - anka-registry
    restart: always
    environment:
      ANKA_REGISTRY_ADDR: "https://anka.registry:8089"
      ANKA_USE_HTTPS: "true"
      ANKA_SKIP_TLS_VERIFICATION: "false"
      ANKA_SERVER_CERT: "/mnt/cert/anka-controller-crt.pem"
      ANKA_SERVER_KEY: "/mnt/cert/anka-controller-key.pem"
      ANKA_CA_CERT: "/mnt/cert/anka-ca-crt.pem"
      ANKA_ENABLE_AUTH: "true"
      ANKA_ROOT_TOKEN: "1111111111"
      ANKA_OIDC_DISPLAY_NAME: "Okta SSO"
      ANKA_OIDC_PROVIDER_URL: "https://dev-1234567.okta.com/oauth2/default"
      ANKA_OIDC_CLIENT_ID: "0oa7a07mc0kQxyfrus11"
      ANKA_OIDC_CLIENT_SECRET: "aHWQYCbH0mTYwLwwIfBvT-JWotYQAR8HAn7glnSB"

  anka-registry:
    container_name: anka-registry
    build:
        context: .
        dockerfile: anka-registry.docker
    ports:
        - "8089:8089"
    restart: always
    volumes:
      - "/Library/Application Support/Veertu/Anka/registry:/mnt/vol"
      - /Users/myUser/:/mnt/cert
    environment:
      ANKA_USE_HTTPS: "true"
      ANKA_SKIP_TLS_VERIFICATION: "false"
      ANKA_SERVER_CERT: "/mnt/cert/anka-controller-crt.pem"
      ANKA_SERVER_KEY: "/mnt/cert/anka-controller-key.pem"
      ANKA_CA_CERT: "/mnt/cert/anka-ca-crt.pem"
      ANKA_ENABLE_AUTH: "true"
      ANKA_OIDC_DISPLAY_NAME: "Okta SSO"
      ANKA_OIDC_PROVIDER_URL: "https://dev-1234567.okta.com/oauth2/default"
      ANKA_OIDC_CLIENT_ID: "0oa7a07mc0kQxyfrus11"
      ANKA_OIDC_CLIENT_SECRET: "aHWQYCbH0mTYwLwwIfBvT-JWotYQAR8HAn7glnSB"
The OIDC ENVs must be set for both services.
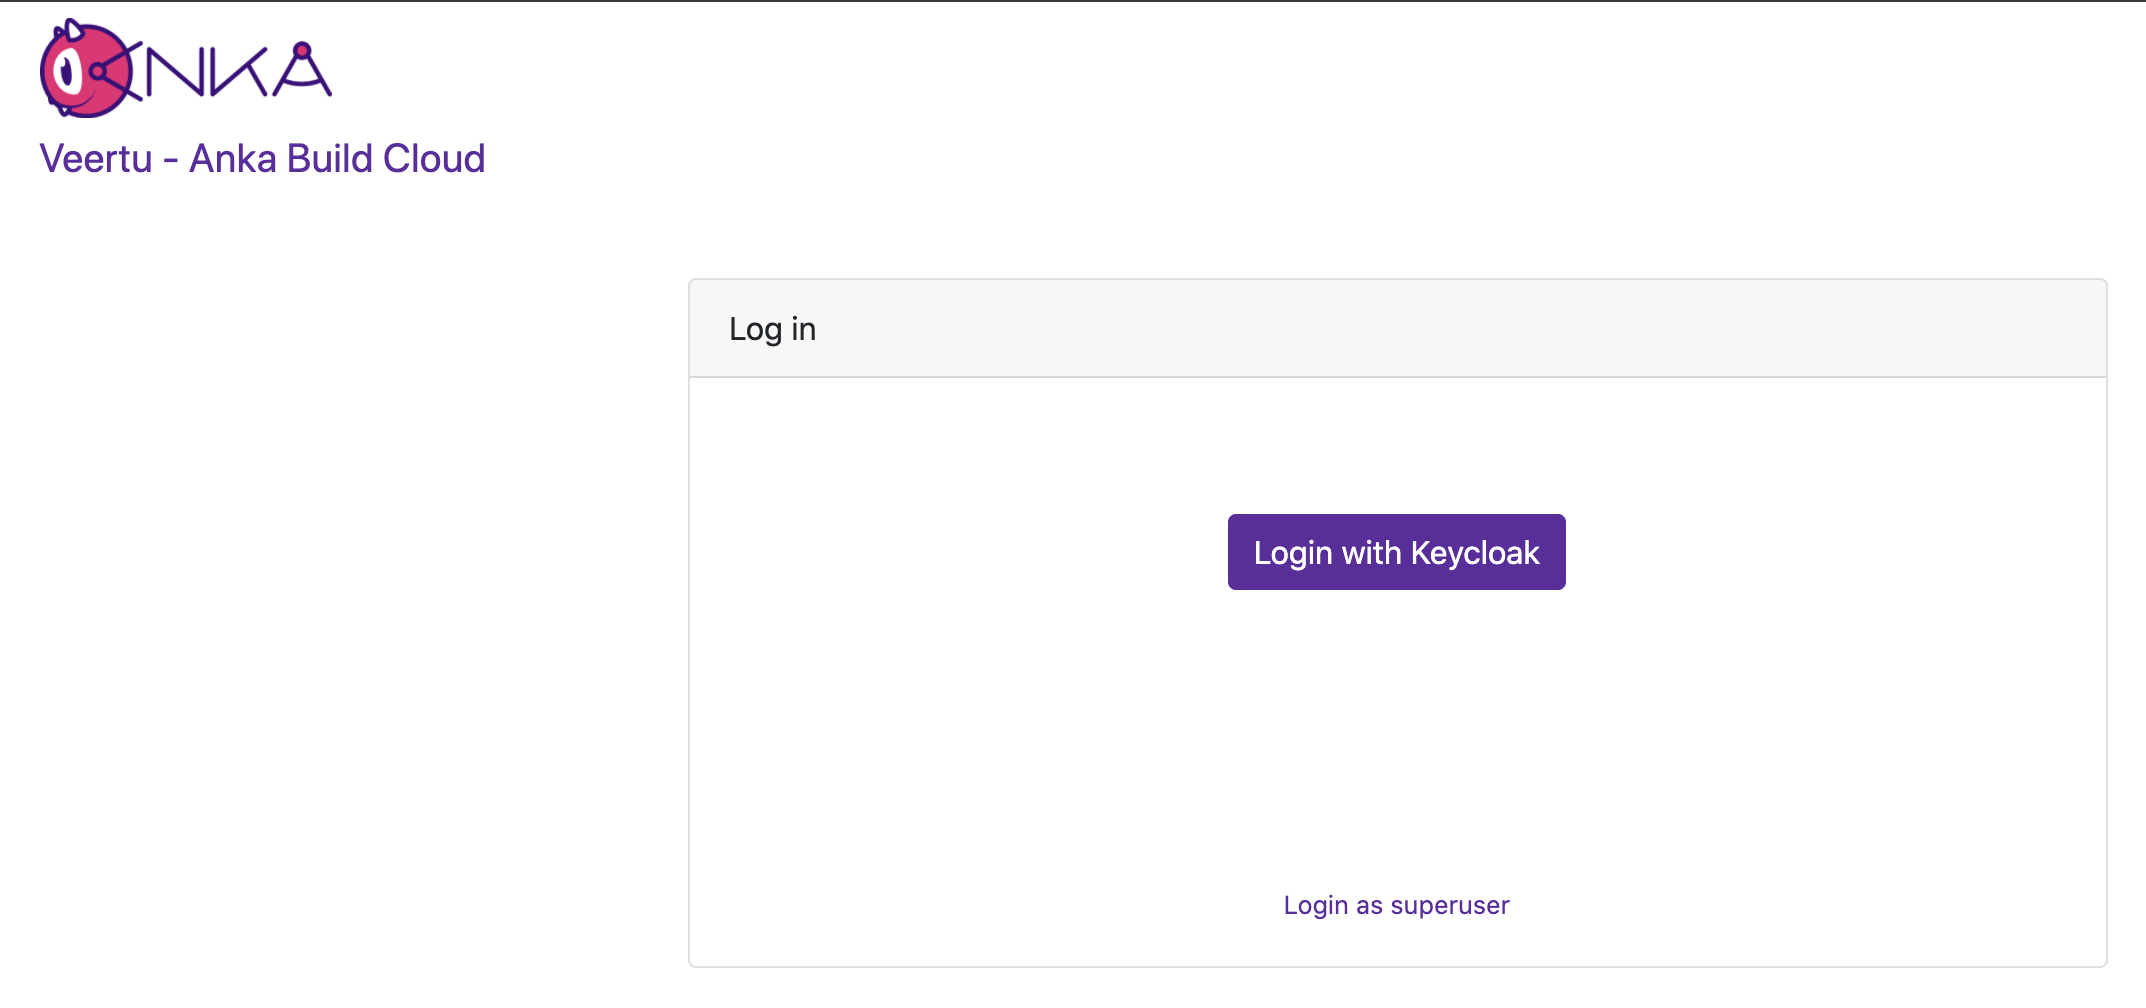
After that, just docker-compose down -t 50 && docker-compose up -d and try accessing the Controller at its HTTPS URL or IP. If you did everything correctly (you enabled certificate authentication and joined your node right?), you should see a Log In box with two options: Login with Okta SSO and Login with superuser.
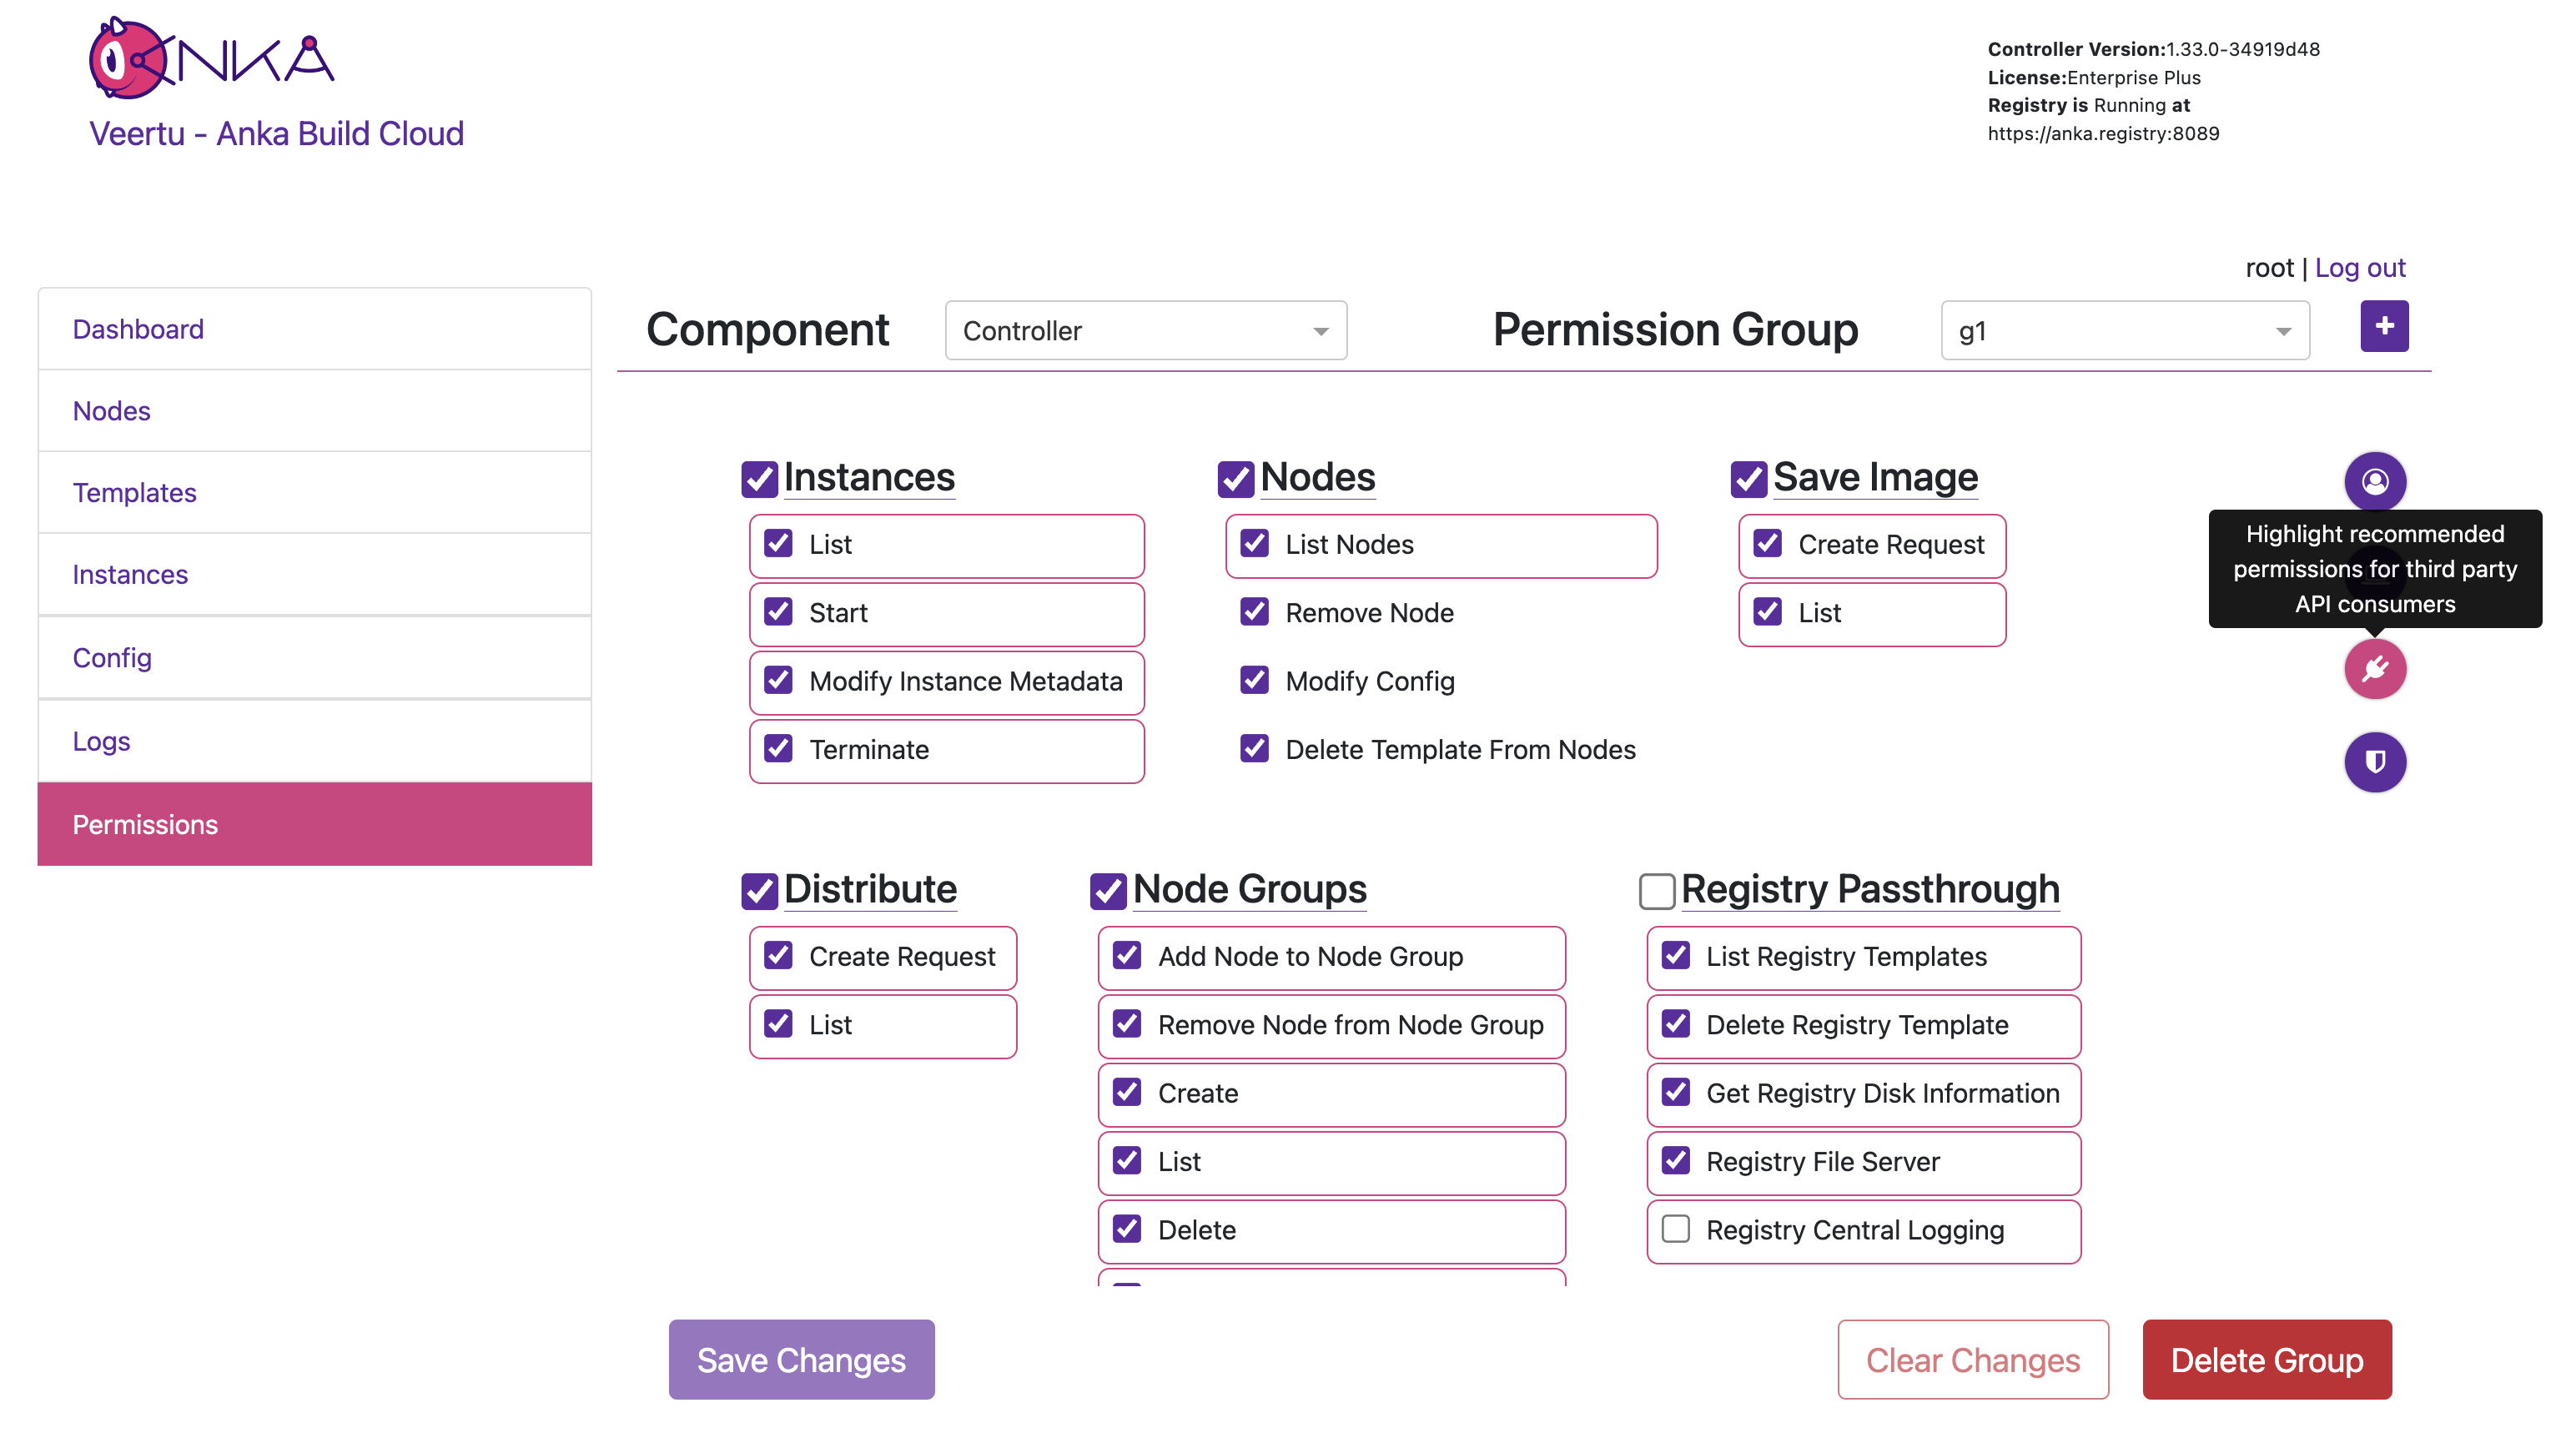
Managing User/Group Permissions (Authorization)
You can then add the exact groups claim name from your SSO provider (or other authorization server software) to the controller’s permission management panel. This gives any users associated to the group in that cloud permission group the specific permissions to the API and even controller UI.
By default, ANKA_ENABLE_AUTH will not use authorization/permissions and allow any certs or users to connect to all API endpoints and pages in the UI. In order to enable Authorization, you will need to include specific ENVs in your config:
ANKA_ENABLE_CONTROLLER_AUTHORIZATIONworks for both combined and standalone (docker) packages.ANKA_ENABLE_REGISTRY_AUTHORIZATIONis for the combined (controller + registry in one binary) package only.ANKA_ENABLE_AUTHORIZATIONis only for the standalone registry package.
Permission groups are configurable from your Controller’s https://<controller address>/#/permission-groups page. You can target and add permissions for either the group name or the username (which is different between the various Advanced Security Features we offer).
This feature requires Enterprise Plus. The regular enterprise license automatically adds all permissions to each certificate or token that is used and gives no control over them.
This also requires that you’ve enabled Root Token Authentication, giving you super user access to the controller UI and permissions.
The permission groups here differ from the groups you assign to nodes within the Controller UI.
Once you’ve added all of the proper permissions, you can now go back to the main Controller page and log out of the superuser. You can now choose Login with Okta SSO, which will redirect you to your Okta to have you log in with your user. You will then be taken to the Controller UI and be logged in as that user.
Final Notes
- UI sessions will have the same length as the OIDC Access Token’s lifetime. Your provider can set this value lower if needed.